Detailed pipe welding technique
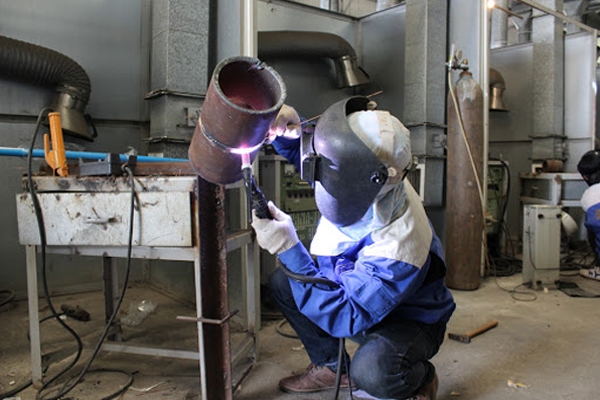
pipe welding is one of the commonly used welding techniques in industry and construction. pipe welding is a difficult welding technique often applied to welding lead pipes, train pipes, gas pipes,...
this is a welding technique that requires more stringent weld quality than other welding techniques. welds must have high penetration, no arc and no leakage into the pipe. let's learn more about pipe welding techniques in the following article to better understand it.
pipe welding steps
preparing the workpiece
cleaning: surface grinding chamfered corners, blunt edges. grind the surface of the weld specimen (from the edge to the edge 30-40 mm).
prepare the welding machine
check the entire welding machine system to make sure the welding machine is working properly. test solder a damaged workpiece to adjust the welding current.
on average, with thick iron pipes, the current ranging from 100 to 150 is reasonable. the current depends on the welding method and welding material. for large pipes, we have to use a large compensator (from 4mm to 5mm), so the welding current must also be larger to melt the compensator steadily (for tig welding)
welding
place a pipe on the workbench, turn the bevel up, align the gap with a "u" bent welding rod core, put the other pipe on top, the chamfer is joined together to form a welding groove. make sure the edge deviation of the two tubes is at most 1.6mm. weld the welded joints symmetrically through the center of the pipe with a length of 10-15mm.
the solder joint must have good penetration into the 1.6mm leg and penetrate into the joint. in order to prevent the gap when welding, the gap spacer can be moved appropriately. the third and fourth butt welds are 90º perpendicular from the butt welds 1 and 2. grind the tack welds to the specifications so that the welds will achieve the quality of penetration.
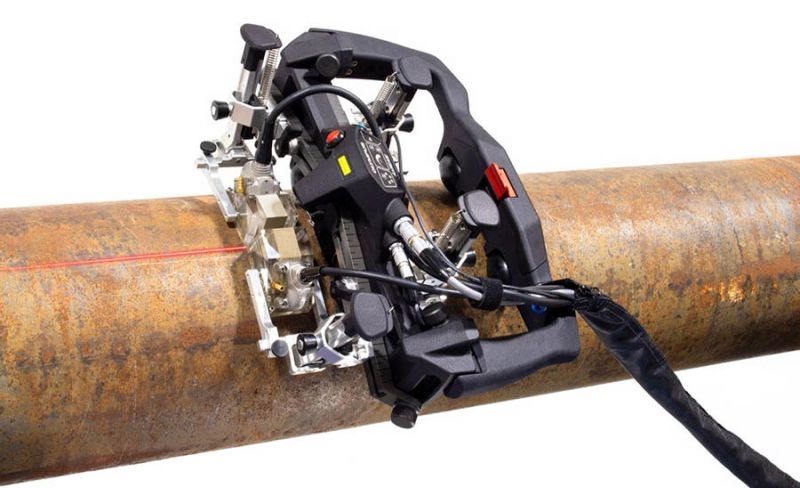
it is possible to make the fixture as a rectangular rail, according to the size of the pipe so that it squeezes the body of the pipe. then put 2 pieces of pipe into the rail, leaving a reasonable distance of about 2mm between the 2 pipes. then insert the compensator and attach the weld. attachment is 4 joints in one weld. the attachments must face each other.
weld the lining layer
clamp the weld specimen fixed at 45º to the ground with the identified studs at 1, 4, 7 and 10 o'clock (clockwise).
prepare to weld
the starting position of the tig welding liner: for good welders, it usually starts at the 6h30' position according to the clockwise position. at that time, the body posture will be crooked to the right and the head will be slightly raised.
for a welder who is not very good, i recommend starting from the 4h20' position, then the person's inclination is less.
welding position
arc priming inside the welding groove, keep the arc burning evenly and the arc distance is twice the diameter of the welding rod, with the displacement, oscillation of the tip of the welding rod slightly zigzag, (serrated or semicircular) and arc provide enough heat to the blunt edge (slightly transverse moves to keep the metal and slag from sagging, as the weld specimen is in a 450-degree oblique position)
when soldering, your hand must be very even, and the other hand must check the compensation rod in a regular and reasonable manner. the skill of the compensator is an extremely important skill in soldering in particular and tig welding in general.
the welding process runs in a clockwise direction. when welding, remember to adjust the balance between the welding hand, the human position and the position of the compensation rod so that it is most suitable and comfortable.
it is possible to apply the welding method in the shape of a saw or a semicircle. for new welders, it is possible to let the small amount of electricity flow and follow the pattern of the saw. as for good welders, they often follow a semicircle or figure 8, the wrist and arm are very smooth and soft, and the angle of attack is very wide. and lenient.
note: try to make a keyhole-shaped hole at the top end of the weld pool slightly wider than the rod diameter to facilitate the complete penetration of the weld metal and evenly adhere to the edges of the weld groove. then stop the arc length about 0.8 mm from the sharp edge of the blunt edge and start turning
gentle translation.
make a keyhole on the solder joint head
for pipes with large openings, it is recommended to use the method of overlapping several times. finish welding the first coating, clean the weld, make sure the groove is wide enough to escape the slag when welding. continue to divide the surface of the finished weld into 3 parts and weld over 1/3 of the previous weld.
in pipe lining welding, absolutely do not let the arc clump and flow into the inside of the pipe.
after priming is completed, the last step of welding is to weld the last layer out. then proceed to grind to clean the weld..
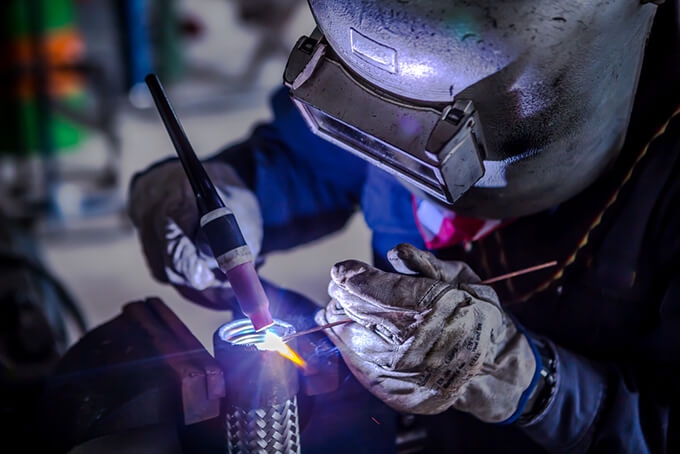
coating welding has 2 main ways: tig welding and mig welding. for pipes with a diameter of ≤ø100, tig welding is used to weld the last layer. for large pipes, use mig welding to cover
requirements: the weld surface is high and uniform, convex arc. the legs of the welds are straight, without missing edges, and are burned.